

How To Mirror Draw In Photoshop Cs6
How to utilize Pigment Symmetry in Photoshop CC 2019
Learn how to employ the new Pigment Symmetry feature in Photoshop CC 2019 to easily create fun, symmetrical artwork and designs!
Pigment Symmetry in Photoshop allows y'all to paint multiple brush strokes at one time to create mirrored, symmetrical designs and patterns. It works with the Brush Tool, the Pencil Tool and the Eraser Tool, and information technology besides works with layer masks.
First added as a technical preview in Photoshop CC 2018, Paint Symmetry is now an official part of Photoshop equally of CC 2019. All of the more basic symmetry options from CC 2018, like Vertical, Horizontal and Diagonal, are included. Plus CC 2019 also adds two new symmetry modes, Radial and Mandala, that allow you lot create amazing, highly circuitous symmetrical artwork in seconds! Permit's see how it works.
To follow along, yous'll need Photoshop CC. And if you're already a Artistic Cloud subscriber, make sure that your copy of Photoshop CC is up to date. Allow'due south get started!
How to paint with symmetry in Photoshop
We'll start by learning the basics of how to use Pigment Symmetry to create symmetrical artwork and designs. Once nosotros know the basics, I'll show you lot how to combine Paint Symmetry with layer masks for more than creative effects!
Pace 1: Add a new blank layer
Starting time by calculation a new blank layer to your document. This will keep your brush strokes separate from everything else. To add a new layer, click the New Layer icon at the bottom of the Layers console:
Clicking the New Layer icon.
Step 2: Select the Brush Tool, Pencil Tool or Eraser Tool
Paint Symmetry works with the Brush Tool, the Pencil Tool and the Eraser Tool, all of which are found in the Toolbar. I'll select the Castor Tool:

Selecting the Brush Tool.
How to download over grand more brushes in Photoshop
Step 3: Open the Pigment Symmetry menu
With the Brush, Pencil or Eraser Tool selected, a Paint Symmetry icon (a little butterfly) appears in the Options Bar. Click the icon to open up the Pigment Symmetry menu:
Clicking the Pigment Symmetry (butterfly) icon.
Step 4: Choose a symmetry option
And and so in the menu, choose a symmetry option from the list. At that place are 10 different styles to cull from in CC 2019, including the new Radial and Mandala options at the bottom:

The Paint Symmetry options in Photoshop CC 2019.
The Paint Symmetry options in Photoshop CC 2019
Here'south a quick summary of how each of Photoshop'due south x Pigment Symmetry options works:
- Vertical: Divides the canvass vertically and mirrors castor strokes from one side onto the other side.
- Horizontal: Divides the canvas horizontally and mirrors brush strokes from the top onto the lesser, or from the bottom onto the top.
- Dual Axis: Divides the canvas vertically and horizontally into four equal sections (top left, top right, lesser left, and lesser right). Painting in i department mirrors your brush strokes in the other iii.
- Diagonal: Divides the canvas diagonally and mirrors castor strokes from one side onto the other.
- Wavy: Similar to Vertical only with a curved, wavy line instead of a straight line.
- Circle: Mirrors castor strokes painted inside a circumvolve outside the circle, and vice versa.
- Spiral: Mirrors brush strokes painted along either side of a spiral path.
- Parallel Lines: Divides the sail into three vertical sections using two parallel vertical lines. Brush strokes painted in the heart section are mirrored in the left and right sections.
- Radial: Divides the canvas into diagonal segments, or "slices". Brush strokes painted in 1 segment are mirrored in the others.
- Mandala: Similar to Radial, merely mirrors the brush strokes within each segment as well, creating twice every bit many brush strokes as Radial.
We won't become through every symmetry pick here since yous can easily endeavour them out on your own. But to show you the basics of how they work, I'll choose a simple one, like Dual Axis. Dual Axis is a combination of the Vertical and Horizontal modes listed above it:

Selecting one of the ten Paint Symmetry options.
The symmetry path
Choosing an option from the menu adds a blue symmetry path to the document. In this case, it's a Dual Axis symmetry path, dividing the canvas vertically and horizontally into iv equal sections:

A symmetry path appears.
Step 5: Resize and take the path
Earlier you can paint with a symmetry path, Photoshop commencement places a Transform box around the path so you tin can calibration and resize information technology if needed. Simply note that the path is for visual reference only. Symmetry paths e'er impact the entire canvas regardless of the path's bodily size. Since painting exterior the path boundary has the same effect as painting within information technology, there's actually zero to be gained by resizing symmetry paths. So in nigh cases, you won't need to resize it.
However, if you exercise desire to resize the path, only drag any of the transform handles to scale the path proportionally. To scale the path from its center, press and concord Alt (Win) / Selection (Mac) as you lot drag a handle. You tin can likewise movement the path to a unlike location in the document past clicking and dragging within the Transform box:

Scaling the symmetry path by dragging a corner handle.
Related: Free Transform's new features and changes in CC 2019
To accept the path (even if y'all did not resize it) and leave out of the Transform command, click the checkmark in the Options Bar, or press Enter (Win) / Return (Mac) on your keyboard:

Clicking the checkmark to commit the path.
Step 6: Paint in ane of the sections to create symmetry
Then, with the symmetry path in place, simply paint inside i of the sections. Photoshop volition automatically copy and mirror your brush stroke in the other sections, creating a symmetrical design:

Painting a single brush stroke creates multiple, mirrored strokes.
The more brush strokes you pigment, the more than complex the design becomes. Even with express painting skills, Photoshop makes information technology easy to come upwards with something interesting:
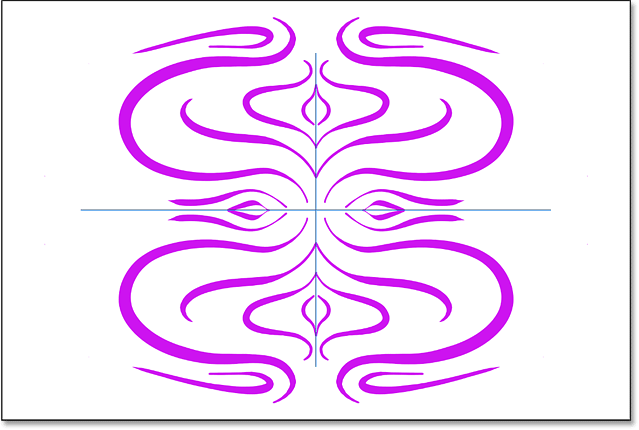
Painting more castor strokes adds to the symmetrical blueprint.
How to hide the symmetry path
To view your artwork without the blue symmetry path getting in the mode, hide the path by clicking the Paint Symmetry icon (the butterfly) in the Options Bar and choosing Hide Symmetry:

Choosing Hibernate Symmetry from the Paint Symmetry options.
Since the path is just for visual reference, you can continue painting and calculation to the design even with the path hidden:

Hiding the path still lets you lot paint symmetrically.
How to show the symmetry path
To show the path again, click the butterfly icon in the Options Bar and choose Show Symmetry:

Choosing Testify Symmetry from the Paint Symmetry options.
And at present the path is once once again visible:

Is information technology art? Probably not, but it was certainly easy.
Viewing the symmetry path in the Paths panel
Like regular paths in Photoshop, symmetry paths announced in the Paths panel. The path is named based on its symmetry manner (in this case, "Dual Centrality Symmetry 1"). And the butterfly icon in the lower correct of the thumbnail tells us non only that it'due south a symmetry path, simply that it'due south currently active. You can accept multiple symmetry paths in the aforementioned document (as we'll see in a moment), just simply one tin be active at a time:

Symmetry paths can be viewed and selected in the Paths panel.
The new Radial and Mandala symmetry options
New in Photoshop CC 2019 are 2 new Paint Symmetry options, Radial and Mandala. Allow's come across how they work.
How to apply the Radial symmetry option
The Radial symmetry mode divides the canvas into diagonal segments, or "slices" (think pizza slices). Painting in one piece mirrors your brush strokes in the others.
Step 1: Choose Radial from the Path Symmetry options
Click the butterfly icon in the Options Bar and choose Radial from the list:

Choosing Radial from the Paint Symmetry options.
Stride 2: Prepare the number of segments
And so cull the number of path segments (slices) y'all need, from 2 to 12. I'll go with five:

Choosing the number of segments to divide the canvas into.
Step three: Paint in 1 of the segments
And then simply paint in one of the segments. Photoshop will mirror your brush stroke in the other segments, creating a radial design:

Creating a radial symmetry design.
How to use the Mandala symmetry selection
Similar Radial, the Mandala symmetry mode likewise divides the canvas into diagonal segments. The difference betwixt Radial and Mandala is that, forth with mirroring your brush stroke in the other segments, Mandala as well mirrors the stroke in the same segment. This adds twice as many castor strokes as Radial, allowing you to create highly complex symmetrical patterns with very piddling time and try.
Stride 1: Choose Mandala from the Path Symmetry options
Click the butterfly icon in the Options Bar and choose Mandala from the list:

Choosing Mandala from the Paint Symmetry options.
Step two: Set the number of segments
Then, but like with Radial, choose the number of path segments yous need. While Radial lets you choose upwards to 12 segments, Mandala is limited to ten. I'll become with viii:

Choosing the number of segments.
Step 3: Paint in ane of the segments
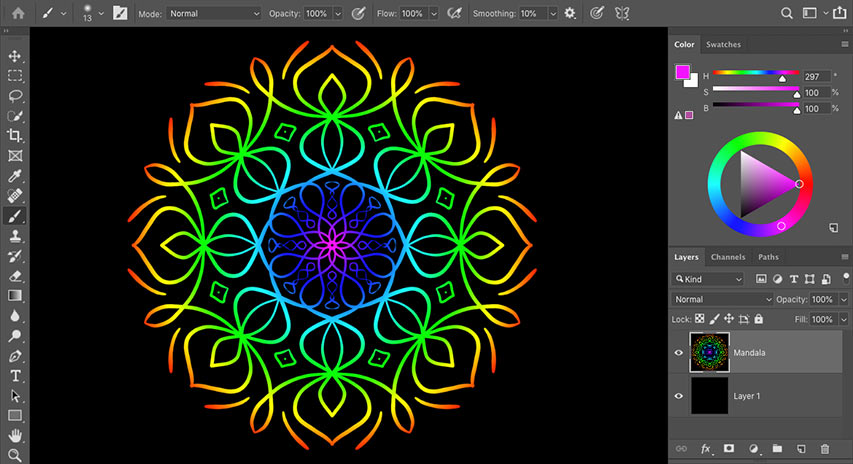
And so, but like before, paint in i of the segments. Photoshop volition mirror your castor stroke in the same segment you lot pigment in, and it will mirror both brush strokes in the other segments. This complex design took me only a couple of minutes:

Mandala is the most impressive (and fun) of Photoshop's Paint Symmetry options.
How to undo castor strokes when yous make a fault
Creating symmetrical designs in Photoshop is fun and easy, merely tin can likewise involve a lot of trial and error. If you don't similar the castor stroke you just painted, you can disengage information technology from your keyboard by pressing Ctrl+Z (Win) / Command+Z (Mac). Proceed pressing the shortcut to undo multiple castor strokes. To redo brush strokes, press Shift+Ctrl+Z (Win) / Shift+Command+Z (Mac).
How to switch betwixt symmetry paths
Photoshop lets us add together multiple symmetry paths to the same certificate, and each one you add appears in the Paths panel. The butterfly icon in the bottom right of a thumbnail indicates the currently-agile symmetry path. Only 1 path can be active at a fourth dimension. In this case, my Mandala path is active:

The butterfly icon shows the active path.
To switch to i of the other paths in the list, correct-click (Win) / Control-click (Mac) on the path you need:

Right-clicking (Win) / Command-clicking (Mac) on the Radial symmetry path.
And so choose Brand Symmetry Path from the card:

Choosing the "Make Symmetry Path" command.
This deactivates the previous path and activates the new 1 so you tin can paint with it in the certificate:

The Radial Symmetry path is now active.
The Last Used Symmetry option
Yous tin also switch from your current symmetry path to your previously-used path by clicking the butterfly icon in the Options Bar and choosing Last Used Symmetry:

The Radial Symmetry path is now agile.
How to plow Paint Symmetry off
To turn Paint Symmetry off and continue painting without the symmetry effect, click the butterfly icon in the Options Bar and cull Symmetry Off:

Choosing "Symmetry Off" from the carte.
How to utilize Pigment Symmetry with a layer mask
Now that we've learned the basics of how Paint Symmetry works, allow's look at how we can apply a symmetry path with a layer mask to create something even more interesting.
In this certificate, I accept a radial gradient on the Groundwork layer:

A radial spectrum gradient.
And if we await in the Layers panel, we see that I besides accept a solid black layer sitting above the gradient. I'll plow the top layer on by clicking its visibility icon:

Turning the peak layer on in the document.
And now the document is filled with blackness, blocking the slope from view:

The height layer is now hiding the gradient.
Step ane: Add a layer mask
With the meridian layer selected, I'll add a layer mask by clicking the Add Layer Mask icon at the lesser of the Layers panel:
Clicking the Add Layer Mask icon.
A layer mask thumbnail appears on the top layer:

The layer mask thumbnail.
Footstep ii: Select the Brush Tool
I'll select the Brush Tool from the Toolbar:
Selecting the Brush Tool.
Step 3: Set the Foreground color to black
And since I want to hide the top layer in the areas where the symmetry consequence appears, I'll make sure my Foreground colour (the brush color) is prepare to black:

Setting the brush colour to black.
Stride 4: Cull a Pigment Symmetry option
I'll choose Mandala from the Paint Symmetry options in the Options Bar:
Choosing a symmetry option.
And Photoshop adds a Mandala symmetry path to the document. To accept information technology, I'll printing Enter (Win) / Return (Mac) on my keyboard:

The symmetry path is added to the document.
Step five: Paint a symmetrical blueprint on the layer mask
Then, to hide the current layer and reveal the layer below it, simply pigment on the layer mask. Every bit the symmetry effect expands, more and more of the layer below is revealed. In this case, the colors from my gradient are showing through the brush strokes:

Painting with a symmetry path on the layer mask to reveal the image below.
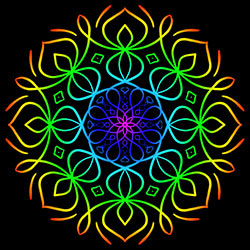
I'll proceed painting to add more brush strokes to the Mandala effect. And here is my final, colorful result:

The final Mandala design.
And there nosotros have it! That's how to use Paint Symmetry in Photoshop CC 2019! Check out our Photoshop Nuts section for more than tutorials! And don' forget, all of our tutorials are at present available to download every bit PDFs!
Other Stuff
© 2022 Photoshop Essentials.com.
For inspiration, not duplication.
Site pattern by Steve Patterson.
Photoshop is a trademark of Adobe Systems Inc.

Source: https://www.photoshopessentials.com/basics/how-to-use-paint-symmetry-in-photoshop-cc-2019/
Posted by: ingramguat1950.blogspot.com
0 Response to "How To Mirror Draw In Photoshop Cs6"
Post a Comment